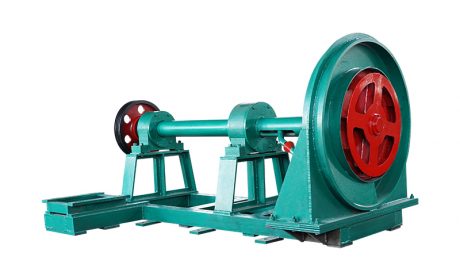
You ever feel like your workshop is just too full, but you still need to get real work done? Honestly, I’ve been there. Whether you're into jewelry making, small-scale metal prototyping, or DIY engineering projects, space is always tight. But here’s the good news: you don’t need a massive industrial setup to roll wire effectively.
Compact wire rolling mills are changing the game for makers working in garages, basements, or shared studios. They deliver serious functionality without taking over your entire bench. And with smart planning, you can set one up in even the tiniest workspace.
So how do you actually make it work? Let’s break down what a compact wire rolling mill is, why it matters, and how to integrate it seamlessly—without sacrificing safety or efficiency.
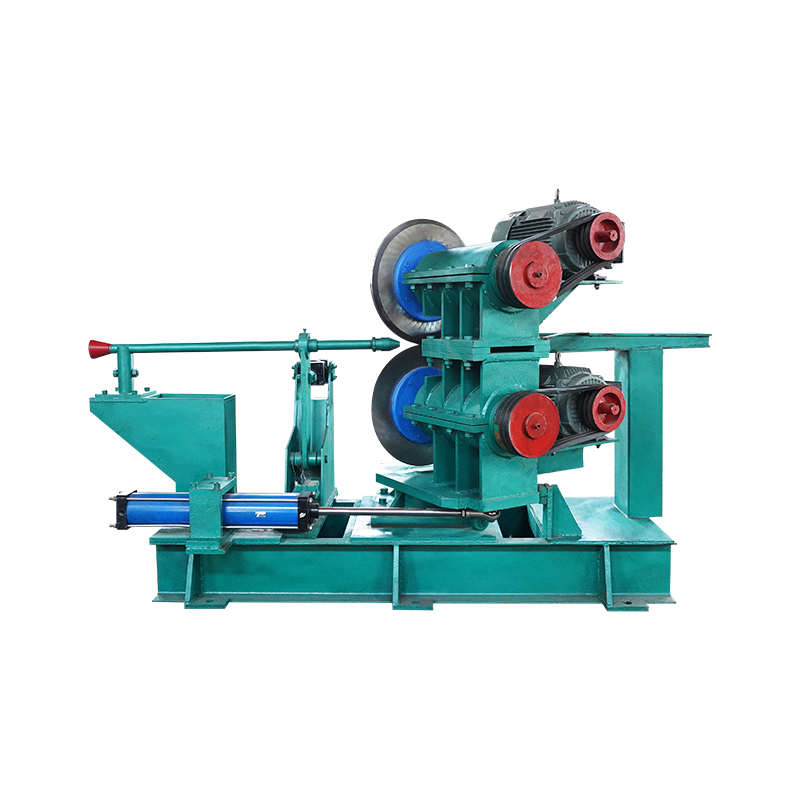
At its core, a wire rolling mill is a machine that reduces the diameter of metal wire by passing it through progressively smaller rollers. It's not magic—it's physics and precision engineering working together.
Think of it like a pasta maker, but for metal. You feed in a thicker rod or wire, turn the handle (or hit the power switch), and out comes thinner, more uniform material. This process is called cold rolling because it shapes the metal without heating it first.
These tools have been around for decades, mostly in large factories. But now, scaled-down versions are available for artisans and small manufacturers. And they’re surprisingly capable.
For example, hobbyist jewelers use them to flatten silver or gold wire into custom-shaped bands. Engineers might use them to create precise diameters for prototype components. The applications vary, but the principle stays the same.
And yes—you can achieve professional results from a desktop-sized unit.
The basic mechanism involves two hardened steel rollers mounted parallel to each other. As you adjust the gap between them, you control how much the wire gets compressed on each pass.
Most models allow incremental adjustments using a dial or screw mechanism. Some advanced units even include digital readouts so you know exactly how many thousandths of an inch you’re reducing per pass.
When you crank the wire through, the rollers apply pressure evenly across its length. This does two things: it reduces thickness and increases length (due to material displacement). It also work-hardens the metal slightly, which can be useful—or something to manage with annealing later.
It’s important to note that these machines don’t cut or stretch the wire. They compress it uniformly, maintaining structural integrity while altering dimensions. That makes them ideal for tasks where consistency matters—like creating matching earring wires or consistent spring stock.
And unlike drawing wire through a die, rolling preserves the surface finish better and allows for non-circular profiles too, if you swap in shaped rollers.
Let’s face it—most of us aren’t running full fabrication shops. We’re working in converted closets, spare rooms, or shared co-working spaces. So size absolutely matters.
A compact wire rolling mill typically fits on a standard workbench or even mounts to a tabletop. Units like the Durston Mini Rolling Mill, for instance, are designed specifically for limited environments. They take up less than two square feet of space.
Because they’re lightweight and modular, you can disassemble or store them when not in use. No need for dedicated flooring, heavy foundations, or overhead cranes.
And since they don’t require external hydraulic systems or massive motors, installation becomes plug-and-play in most cases.
This kind of flexibility means you can keep your workspace multipurpose. One day it’s a soldering station; the next, it’s a mini production line for custom wire parts.
Is every model this small? Not necessarily. But the market has clearly shifted toward space-conscious designs—and that’s great news for independent creators.
Here’s another win: compact mills use significantly less energy than their industrial counterparts.
Many operate on manual hand cranks, meaning zero electricity usage. Even powered versions often run on low-wattage DC motors or standard 120V AC outlets. There’s no need for three-phase power or special circuits.
That translates directly into lower operating costs. Over time, especially if you're running frequent small batches, those savings add up.
Plus, smaller machines mean reduced maintenance expenses. Fewer moving parts, simpler lubrication needs, and easier access for cleaning all contribute to longer uptime and lower repair bills.
And let’s talk about initial investment. While high-end industrial mills cost tens of thousands, compact models start at just a few hundred dollars. For many users, this brings metal forming capability within realistic budget range.
Sure, they can’t produce miles of wire per hour—but for prototyping, repair work, or artisan production, they offer excellent value.
Would you rather spend $50,000 on equipment—or under $2,000 and still get 80% of the functionality you need?
Maybe you’re starting small, but you want room to grow. That’s where scalability comes in.
A compact wire rolling mill isn’t just a starter tool—it’s a scalable solution. Many systems support add-ons: extra roller sets, motorized feeds, tension controls, or gauging attachments.
Start manually. Prove your concept. Then upgrade components as demand increases.
For example, a jeweler might begin by hand-feeding copper wire for handmade chains. Once orders pick up, they could attach a servo-controlled feeder to improve consistency and throughput.
Or imagine a robotics student prototyping actuator arms. A small mill lets them test different alloys and thicknesses before committing to CNC machining or outsourcing.
This "start small, scale smart" approach reduces risk and keeps capital expenditure aligned with actual output.
And because these systems are modular, swapping rollers for different profiles (round, square, half-round) takes minutes—not days.
In short: you’re not locked into one workflow. You can adapt as your needs evolve.
To help visualize what goes into a typical setup, here’s a breakdown of the main components found in most compact wire rolling mills:
| Component | Function | Common Variations |
|---|---|---|
| Rollers | Compress and shape the wire | Smooth, knurled, profiled (square, triangle) |
| Roller Material | Determines durability and finish quality | Tool steel, hardened chrome alloy |
| Frame | Supports the rollers and maintains alignment | Cast iron, aluminum alloy, steel plate |
| Drive Mechanism | Powers the rollers | Hand crank, belt-driven motor, direct-drive |
| Adjustment Knob | Controls roller gap precision | Micrometer-style dial, coarse/fine screws |
| Mounting Base | Secures the mill to a surface | Bench clamp, bolt-down flange, magnetic base |
As you can see, not all mills are built the same. Your choice depends heavily on what kind of work you plan to do.
For occasional use, a hand-cranked model with smooth rollers may be plenty. If you're doing repetitive production runs, a motorized version with digital gap control will save time and reduce fatigue.
One thing to watch: alignment. Misaligned rollers cause uneven compression and can damage both the wire and the machine. Look for models with rigid frames and adjustable bearings to minimize wobble.
Also consider accessibility. Can you easily change rollers? Is the adjustment knob within reach during operation? These little details matter after your third hour of continuous rolling.
And remember—just because it’s compact doesn’t mean it should feel cheap. Solid construction ensures consistent results and long-term reliability.
Before you unpack the box, grab a tape measure and sketch a quick layout of your workspace.
Where will the mill go? Will you stand or sit while using it? How much clearance do you need for feeding wire in and collecting it on the other side?
Ideally, leave at least 12 inches behind and in front of the mill for smooth wire travel. If space is really tight, consider routing the output into a spool tray or basket mounted below bench level.
Position the mill near your primary workstation—close enough to move materials easily, but far enough to avoid clutter. Avoid placing it directly next to heat sources like torches or kilns unless properly shielded.
Also think about workflow sequence. Are you going to cut wire first, then roll it? Or roll a long piece and cut afterward? Each method affects how you organize tools and storage.
Pro tip: label input and output zones. A simple sticky note saying “Raw In” and “Rolled Out” helps maintain mental clarity during long sessions.
And if you share the space, communicate your setup clearly. Nothing kills creativity faster than tripping over misplaced tools.
Even small mills generate force. Keep fingers, loose clothing, and hair away from moving parts.
Maintain at least 6 inches of clear space around the drive side (where the crank or motor spins). Never operate the mill with guards removed.
If you're using a motorized system, ensure the power cord isn’t stretched across walkways. Use cord clips or conduit to route it safely.
Ventilation usually isn’t a major concern with dry rolling processes. However, if you ever use lubricants (like drawing compound or oil) to reduce friction, make sure there’s airflow to prevent buildup of fumes.
A small benchtop fan pointed away from the work area can help circulate air without disturbing delicate operations.
And always wear eye protection. Tiny metal fragments or broken wire ends can fly off unexpectedly—especially when working with hardened alloys.
Sound levels are generally low, but if noise becomes an issue in shared spaces, look for enclosed gearboxes or rubber-mounted motors that dampen vibration.
Follow the manufacturer’s instructions carefully during assembly. Skipping steps—even minor ones—can lead to misalignment or premature wear.
Once assembled, calibrate the roller gap before your first use. Start with the widest opening and gradually tighten it while testing with known-diameter wire.
Use precision gauge blocks or calibrated drill bits to verify settings. Don’t rely solely on the dial markings unless they’ve been factory-calibrated and verified.
Run a test piece slowly. Watch how the wire exits. Does it bend upward or veer sideways? That’s a sign the rollers aren’t parallel.
Adjust the frame leveling feet or mounting clamps as needed. On some models, shims are provided to fine-tune alignment.
After successful calibration, mark your common settings with colored tape or a permanent marker. For example, red for 1mm reduction, blue for flattening 14-gauge wire.
Keep a logbook nearby to record successful passes, pressures used, and any quirks you notice. Future-you will thank present-you when repeating a job six months later.
And finally—lubricate only as recommended. Too much grease attracts dust and grime. Too little causes excessive friction. Stick to the manual.
Not all metals behave the same under pressure.
Soft metals like copper and fine silver roll easily and respond well to gradual reductions. You can typically achieve up to a 30–40% thickness reduction per pass without cracking.
Aluminum is trickier. It’s soft but gummy. Without proper roller finish or light lubrication, it can stick or tear.
Harder materials like stainless steel or spring steel require more force and slower passes. Attempting aggressive reductions risks damaging the rollers or stalling the motor.
Always check the manufacturer’s guidelines for maximum hardness ratings. Some compact mills are rated only for soft-annealed metals. Others handle tempered steels with appropriate gearing.
Durston, for example, offers roller kits rated for higher tensile strength materials. But again—verify compatibility before pushing limits.
And remember: repeated rolling hardens the metal. Annealing may be necessary between passes for ductile results.
So ask yourself: what materials will I use most? Choose a mill that excels at those—not one that merely claims broad compatibility.
What thicknesses do you need to produce?
Gauge range is critical. Most compact mills handle anything from 8mm down to 0.5mm diameter, depending on roller design and frame rigidity.
But don’t assume all models cover the full spectrum. Entry-level units may struggle below 1mm without chatter or deflection.
Look for specifications that list minimum and maximum achievable diameters—preferably backed by real-world tests.
Some manufacturers provide downloadable charts showing reduction stages for common gauges. These can be incredibly helpful for planning multi-pass jobs.
Also consider whether you need round wire only—or if you’ll benefit from specialty rollers for flat, square, or half-round profiles.
Jewelers often invest in interchangeable roller sets. Being able to switch from round to flat in minutes adds huge versatility.
So define your target gauge early. Then choose a system that delivers clean, consistent results across that range.
This boils down to volume versus control.
Manual feeding gives you complete tactile feedback. You feel resistance changes instantly. Great for learning, troubleshooting, or one-off pieces.
But it’s slow and fatiguing over long runs. Consistency suffers after 50+ passes.
Automated feeding—using a servo-driven pinch roller or geared feed table—improves repeatability and speed. Ideal for batch production.
However, automation adds cost, complexity, and space requirements. You’ll need additional mounting room and possibly external controllers.
For most small workshops, semi-automated setups strike the best balance. Think: hand-cranked mill with a guided entry funnel and exit guide bushing.
That way, you maintain control while minimizing handling errors.
Ask yourself: am I making one-of-a-kind art pieces—or dozens of identical connectors?
Your answer determines how much automation you really need.
Treat your mill like any precision tool: routine care prevents big problems.
Before each use, inspect the rollers for nicks, debris, or built-up residue. Wipe them clean with a lint-free cloth and isopropyl alcohol if needed.
Check roller alignment visually. Spin them by hand—do they turn smoothly? Any grinding or binding indicates bearing issues.
Lubricate gears and adjustment screws according to the schedule. Most manufacturers recommend light machine oil every 10–20 hours of operation.
Avoid over-lubricating. Excess oil attracts metal particles and forms abrasive paste.
Keep spare rollers and fasteners stored nearby in labeled containers. Nothing stops progress faster than losing a tiny set screw.
And document everything. Note unusual noises, performance drops, or changes in output quality. Early detection saves downtime.
Problem: Wire curls after exiting the mill.
Cause: Uneven pressure or misaligned rollers.
Fix: Recheck alignment and ensure equal spring tension (if applicable).
Problem: Surface scratches appear on rolled wire.
Cause: Dirty rollers or embedded grit.
Fix: Clean thoroughly and inspect for burrs.
Problem: Motor stalls or cranking feels stiff.
Cause: Too aggressive a reduction or lack of lubrication.
Fix: Reduce pass depth and reapply recommended lubricant sparingly.
Problem: Inconsistent diameter along length.
Cause: Improper tension or uneven feeding speed.
Fix: Use guide rollers or add a tension arm to stabilize input.
Keeping a checklist near the machine helps diagnose issues quickly.
And if you’re stuck? Reach out to user communities. Forums like The Ganoksin Project host active discussions on rolling mill techniques and repairs.
Here’s the truth: a well-maintained compact mill can last decades.
But abuse cuts life short fast.
Never force a pass that feels wrong. If the wire won’t feed smoothly, stop and reassess.
Stick to recommended materials and reduction rates. Pushing beyond specs risks bending shafts or stripping gears.
Store the mill covered when not in use. Dust and moisture are silent killers of precision machinery.
And periodically disassemble key components for deep cleaning—especially if you work with corrosive materials or salty fingerprints (common in hand-fed operations).
Consider upgrading to carbide-coated rollers if you frequently process abrasive alloys. They resist wear far longer than standard steel.
Finally, respect the machine’s limits. It’s compact—not weak—but understanding the difference keeps it running strong.
Let’s talk real examples.
A boutique jewelry designer in Portland uses a compact rolling mill to create signature textured bands. By embedding patterned plates between the rollers, she produces unique finishes unachievable with sandpaper or hammers.
She runs batches of 20–30 pieces at a time, stores them pre-cut, and assembles orders on demand. Her entire production line fits on a single 4' x 2' table.
Another case: a micro-engineering startup in Austin prototypes sensor leads using rolled constantan wire. Instead of ordering custom diameters, they adjust their mill to exact tolerances in-house—saving weeks on delivery and hundreds in NRE fees.
Even educational makerspaces benefit. Schools and community centers install compact mills because they’re safe, intuitive, and teach fundamental metallurgy concepts through hands-on practice.
These aren’t edge cases. They reflect a growing trend: decentralized, agile manufacturing enabled by accessible tools.
And as additive methods dominate headlines, it’s refreshing to see subtractive and formative processes thriving in smaller formats too.
So whatever your craft—artistic, technical, or hybrid—there’s likely a place for a compact rolling mill in your process.
Yes, but with caveats. High-strength alloys like music wire or martensitic stainless steel can be processed, provided the mill is rated for such materials. Check the manufacturer’s specifications for maximum hardness tolerance. Models with reinforced frames and hardened tool-steel rollers perform better. Always use gradual reductions and avoid exceeding torque limits to prevent damage.
Most compact wire rolling mills require less than 2 square feet of bench space. Units like the Durston Mini Rolling Mill measure approximately 12" x 8", with minimal height. Allow an additional 12 inches front and back for wire input/output handling. Wall-mounted or fold-away models can further reduce footprint in ultra-tight areas.
Essential safety gear includes ANSI-approved safety glasses to protect against flying metal fragments. Gloves are generally not recommended near moving rollers due to entanglement risk. Wear close-fitting clothing and tie back long hair. If using lubricants, ensure adequate ventilation or wear a respirator if fumes accumulate. Always follow lockout/tagout procedures during maintenance.
Please send us your request and we reply to you with in 24 hours.



Submit Request